
Exploring the Chained Coffin
Welcome to Family Game Knights, our regular tour through of the Shudder Mountains and The Chained Coffin box set.
For those uninitiated with the Chained Coffin, creative lead +Michael Curtis and the rest of the Goodman Games crew have created a wonderful and vibrant fantasy campaign setting based on Appalachian myth and legend. As someone who spent nearly every summer vacationing at Hungry Mother State Park in western Virginia as a kid, with many day trips to the Great Smokey Mountains, coal mine tours, and outdoor theater at the Cherokee Reservation, the Shudder Mountains feel right at home.
It's my intention on running pretty much all of these Family Game Knights sessions in the Shudder Mountains as a campaign.
Here are our previously spun yarns:
- Session 1 - Sour Spring Hollow (from The Chained Coffin)
- Session 2 - Moonricket Bridge (from Tales of the Shudder Mountains)
- Session 3 - Doom of the Savage Kings (from Doom of the Savage Kings)
- Session 4 - Doom of the Savage Kings, Pt 2 (from Doom of the Savage Kings)
Also to note: I'm working on a Shudder Mountain soundtrack through a YouTube playlist. Any suggestions? Here's where I'm at so far.

The Adventuring Party
- Jen
- Wize Wizard McBride - Cleric
- Evie
- Jeffff - Warrior (she plans to add another "f" after each gained level)
- Carrie
- P. Specs - Thief
- Andy
- Waldon - Thief
- Jeremy
- Sir Huey, Keeper of the Sacred Door - Warrior
- Frank
- Zzizzle Fenderbender - Dwarf
- Ella
- Quinn - Wizard

Doom of the Savage Kings, Part Three
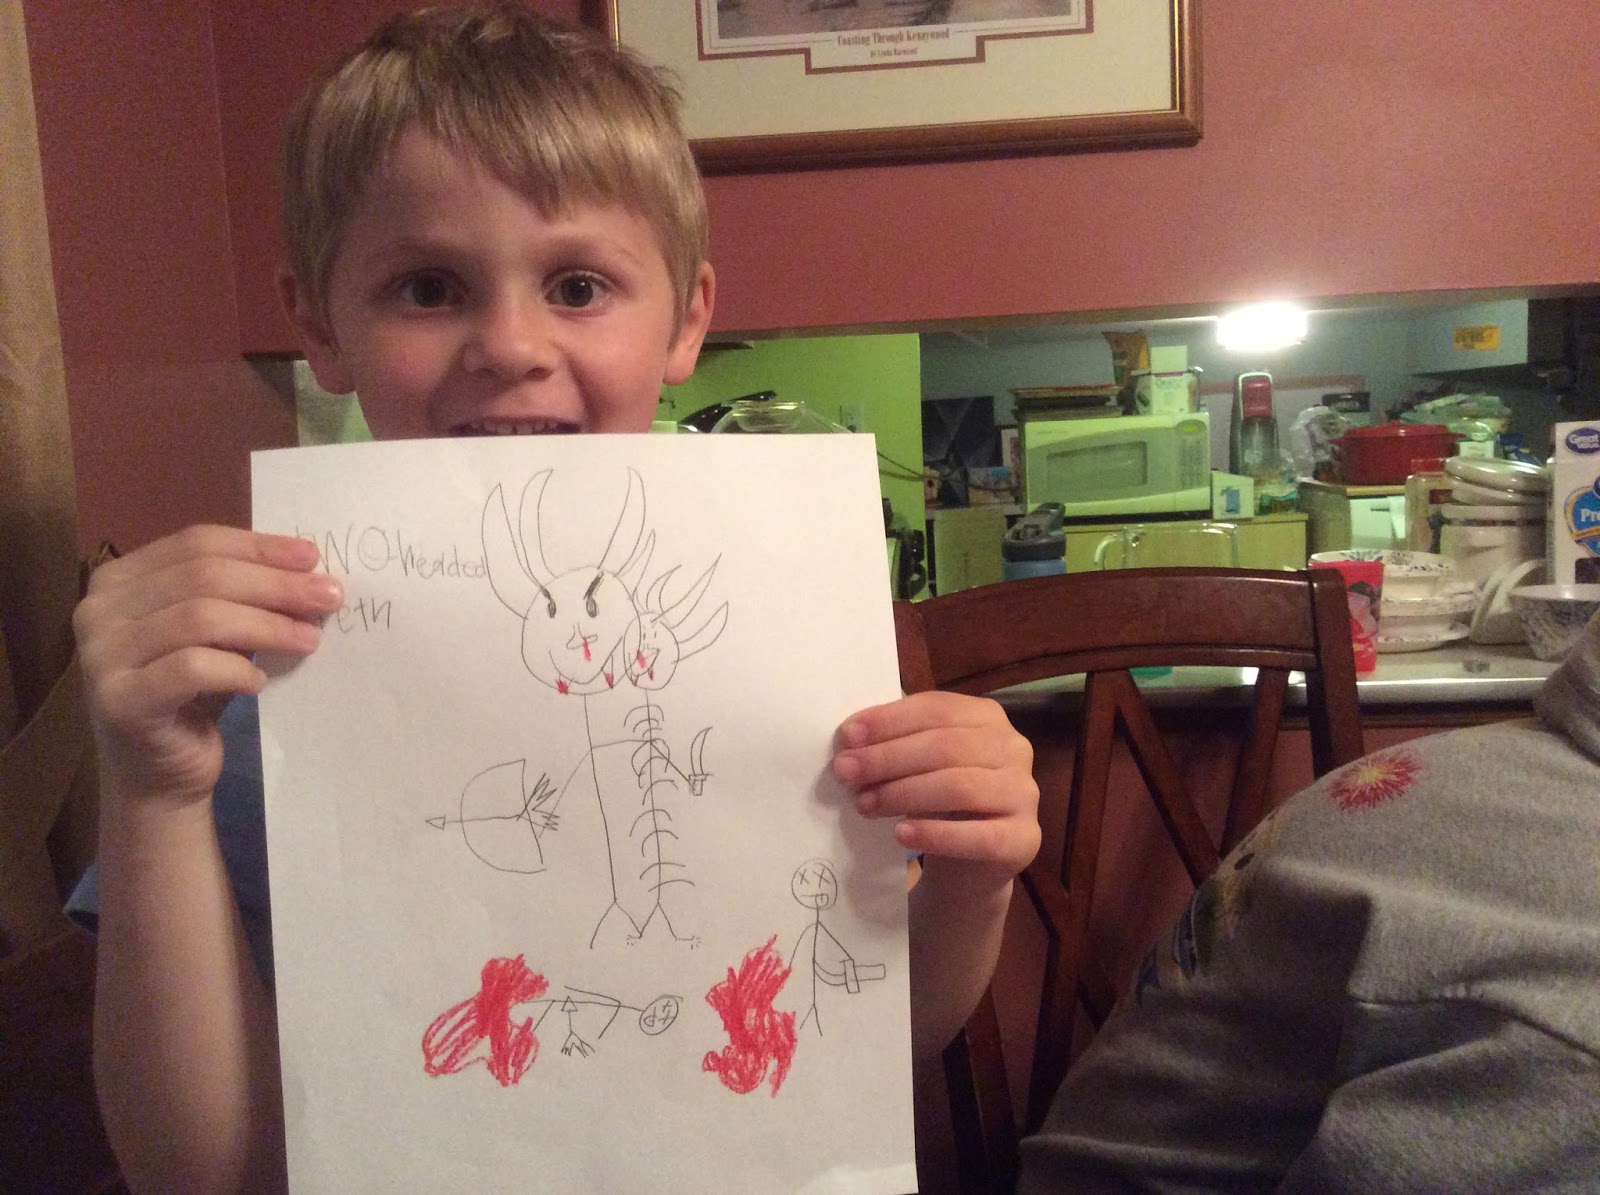
Judge's Note: You may notice a few monsters in this play report that were not in the original adventure Doom of the Savage Kings. This is because these creations were designed by my son Cooper prior to the adventure. Cooper's been a bit too intimidated to join in these big games with a table full of grownups. So to help bring Cooper closer to our game, I let him play as Co-GM last night, and he helped run his new creations: the Deatheadians. I'll have full stats for the three Deatheadians later in this post.
This was one of those sessions where it was really hard for me to keep tabs on what was going on during the game. Typically as we play I'll keep a quick log of main points from the game. Notes like this:
This was one of those sessions where it was really hard for me to keep tabs on what was going on during the game. Typically as we play I'll keep a quick log of main points from the game. Notes like this:
- Enter room
- Four by two deaths
- Jen heal disapproval
- Big trip room
From each of those notes, I'm reminded what happened during the session, and I can turn it all into a beautiful play report for you to read. But sometimes there is so much going on that is so crazy and fantastic that I just can't keep up. I can either run the game or I can keep track of what's going on. I find it's always best to focus on the game.
If last night had a theme, it was "saying yes." We have a fairly new player (Ella), and I really wanted to showcase how much freedom can be discovered within a tabletop role-playing game. I also made sure to be more open to my wife's crazy and over the top role-playing style. For those of you who may have had Jen at your table (or will have her at your table in the future), she can get a little crazy. Her characters are often outlandish, mischievous, and they continuously break the fourth wall.
So yes, playing with +Jennifer Walls is like playing with Deadpool.
Our adventure last night played out as follows:
The PC's had just finished exploring a chamber with a dead end in Tomb of Ulfhoenar. There was a great door on the far wall that could not be opened, flanked by a pair of unlit braziers. We started off our evening with a battle with four terrible monstrosities... the dreaded Two-Headed Deaths! Scroll to the top of this blog post. See that picture of Cooper? See the monster he's holding?
Two-Headed Death!
This was a pretty brisk fight, with the four single-hit die monsters not serving much of a challenge. That's okay, Cooper was hard at work making more death for later.
After a little searching the party discovered a hidden passage that led west. The next several sequences played out very quickly, so I'll list them in the same fashion.
- The thieves, Walden and P. Specs, crawl into the secret passage.
- The rest of the party hears a scream as P. Specs quickly crawls back out, followed by Walden, followed by an angry Tomb Ghoul.
- Walden, on the verge of death after getting slashed to hell by the ghoul, ran behind his teammates and hid under his shield.
- The Wize Wizard McBride tries to heal Walden but fails and gained disapproval. More on that in a moment.
- The party nearly defeats the Tomb Ghoul before the Wize Wizard McBride steps forward and talks some sense into the undead.
- The Wize Wizard McBride names the Tomb Ghoul "Brock," and takes it on as a minion.
I need to take a moment to talk about the Wize Wizard McBride's terrible spellcasting. This was the single worst evening for a Cleric that I've ever seen in my years of running Dungeon Crawl Classics. My wife's character gained at least four points of disapproval after having spent so much of last week trying to remove. She also rolled low enough to have to roll on the Disapproval table three times, losing two spells for the day and earning some serious distrust from her deity Cthulhu.
But she bounced back.
For the rest of the night, the Wize Wizard McBride would go into full conversion mode on every NPC that he met, in a very unorthodox fashion: the Cthulhu T-Shirt reveal. When the Wize Wizard McBride wanted to convert someone, he'd rip open his tunic and show off a Cthulhu T-Shirt. I don't know how this came into play, and don't ever remember giving it out as equipment, but Jen said that "WWMcB" had it, so I guess he did.
The next sequence of events was pretty quick too:
- The Wize Wizard McBride asks Brock about the way to the Wolf-Spear, and the ghoul motions towards the braziers in the main room.
- Walden and Huey decide to go back down the secret passage and they enter what appears to be a treasure room with a central pillar. Hung on the pillar were a wolf-spear and a shield.
- Walden shoots at the wolf-spear with his crossbow to knock it down. He hits the pillar instead.
- The wolf-spear falls to the ground and shatters. Another fake!
- The entire room started to collapse as a great trap goes off!
- Walden escapes quickly.
- Sir Huey almost dies by falling debris, but escapes anyway.
When the two return to the main room Quinn (played by new player Ella) lit the two braziers and a secret portal in the ceiling opened up.
Sometimes new players know best.
A Six-Headed Death Bomb drops out of the secret portal, and that's a pretty fierce fight. During the battle, Walden pick-pockets the "bomb" from the demon/human/skeleton/human monstrosity. Zzizzle helps. With the Six-Headed Death Bomb defeated, the party investigates the portal.
The secret chamber is a throne room, with a skeletal king resting upon the throne. Although nervous to take the swag from the skeleton king, Walden grabs a spear, a horn, and a silver wolf pelt. As he leaves, he hears some creaking, but Walden doesn't look back. But the skeletal king must have found Walden worthy, because everyone else sees the undead lord give a "thumbs up."
Now with the wolf-spear, the party ditches the tomb and heads back to Hirot.
Along the way, a band of hunters approach the team. The leader says that they had been sent by the Jarl to take the spear from the party should they be successful in the Tomb. Then the Jarl showed up. The Jarl had been with the party the entire time, and demanded that the hunters back off and let them head back to Hirot. All of the hunters are okay with this except for one. That last guy thought that the Jarl wasn't actually the Jarl, but an imposter. Walden killed that guy for being a snitch. The rest of the hunters disband and head back into the woods to do all kinds of hunting stuff while the Jarl leads the party to Hirot.
But it wasn't the Jarl.
Right before what I expected would be a combat, my daughter Carrie (playing P. Specs the Thief) asked if she could impersonate the Jarl with her Disguise Self ability. I was okay with it, but said that she'd need a high roll. Carrie dumped a ton of Luck into the roll, and I figured that it made for a much more enjoyable encounter than just another fight.
Once back in Hirot, the players all took turns buying and selling their stuff from the adventure. They bought armor, weapons, and gear while equipping themselves with the magical items discovered during the quest. Sir Huey took the Horn of Kings while Jefff would wield the Wolf-Spear. Quinn cast Find Familiar, and ended up with a fairly useful focal squirrel familiar that she named Kippy. Quinn could cast spells, like Flaming Hands, through Kippy, with added effect. I'm sure that's going to make for an awesome scene later! Sir Huey, who was really injured, got his bride-to-be, the witch Ymae, to heal him, although the potion caused a bit of corruption and turned his feet into cloven hooves.
This moment triggered a lot of nostalgia for me. Here I was, at a table with three of my good friends, my wife, my daughters, and one of my daughter's friends, watching all of them invest some time customizing their characters with their hard-won treasure. The table was littered with popcorn, pencils, dice, and doodles. It was the most "D&D-like" moment that I've experienced in a long time. It felt like home.
It's moments like these that make me love Dungeon Crawl Classics so much. An infusion of the old and nostalgic with the new and innovative. Moments that speak to the old-school gamers as well as those who have never touched a tabletop RPG. There are a lot of games out there that touch on these moments, and bring them to the table occasionally, but in DCC, this "nostalgic innovation" is fully embraced, both within the game and the community.
Crap, I'm getting misty eyed just thinking about it.
Anyway, that's when the Ten-Headed Death Sword appeared...
The party had left town for the moors, and before entering the swampy territory a terrible, ten-headed, part human, part demon, part skeleton, and part human monster appeared, tethered together wielding a bow and knife, with swords on their heads.
Walden shrugged and blew it up with the bomb he picked off of the six-headed variant earlier. Then Jefff stabbed it in the heads.
A Fine Selection of Quotes from the Table
"Hey guy. So you're octopus'ish, and I like octopuses. Bros?" - The Wize Wizard McBride tries to talk a drippy tomb ghoul into being his minion.
"This is what happens when you call me a prospector!" - P. Specs, masquerading as the Jarl, kills the one hunter who didn't believe that the prospector was the Jarl.
"I'm changing my title to 'Hand of the Jarl.'"" - Walden, after seeing P. Specs take on the Jarl's persona.

"This is what happens when you call me a prospector!" - P. Specs, masquerading as the Jarl, kills the one hunter who didn't believe that the prospector was the Jarl.
"I'm changing my title to 'Hand of the Jarl.'"" - Walden, after seeing P. Specs take on the Jarl's persona.
Campaign Crematorium
- None this session

Deatheadians
These three entries are courtesy of my son Cooper. Just before the game, Cooper (who was my Co-GM) offered to make some monsters to throw into the game. He made the first one just before the game, and the second two while we were playing, throwing them into battle just after their creation. I've tweaked them a little, but have tried to keep them exactly as Cooper intended. I really enjoyed playing DCC this way, and am considering running a few off-book games at Gen Con using this Father/Son Judging Method, with random, on-the-fly monster creation.
There's not much ecology to the Deatheadians. Just know that they are all "part demon, part human, part skeleton, and part human." Cooper's words. So technically two parts human, one part skeleton, one part demon.
There's not much ecology to the Deatheadians. Just know that they are all "part demon, part human, part skeleton, and part human." Cooper's words. So technically two parts human, one part skeleton, one part demon.
- Two-Headed Death: Init +2; Atk Bow +2 (1d6) or Knife +2 (1d4); AC 12; HD 1d8; MV 30; Act 2d20; SV Fort +2, Ref -2, Will +2; AL C
- Six-Headed Death Bomb: Init +0; Atk Bow +2 (1d6) or Knife +2 (1d4); AC 10; HD 6d8; MV 40; Act 6d20; SV Fort +2, Ref -2, Will +2; AL C
- Special: Plant Bomb. Six-Headed Death Bomb attempts to surround a medium sized target and plant a bomb on them. Reflex Save 15 to avoid, or suffer 4d6 damage explosion. The Six-Headed Death Bomb takes half of this damage.
- The Six-Headed Death Bomb bow is poisonous. If you pick it up, make a DC 10 Fortitude Save or Die. Then the bow disappears.
- Ten-Headed Death Sword: Init +2; Atk Bow +2 (1d6) or Knife +2 (1d4); AC 8; HD 10d8; MV 50; Act 10d20; SV Fort +2, Ref -2, Will +2; AL C
- Special: Surrounding Sword. The Ten-Headed Death Sword can surround a target and make a flurry of attacks with their sword heads. The target must make a DC 15 Reflex Save to avoid taking 10d6 damage.
- The Ten-Headed Death Sword bow is poisonous. If you pick it up, make a DC 10 Fortitude Save or Die. Then the bow disappears.
No comments:
Post a Comment